Equipment Evolution Step 1: Astro-Camera and changing "Tracking" to "Guiding"
After the first promising tests I could have continued with the initial equipment setup for a while. However, I had the impression that I am enjoying astrophotography enough to move to a more "final"setup as quickly as possible. I was expecting that a dedicated, cooled astro camera, an auto-guiding setup and a new mount will probably be required. On the other hand I wanted to take this journey in steps so that I didn’t have to deal with too many new things at the same time. So I took the decision to go with the cameras first. That way I would have everything ready to go to test the guiding accuracy of a new mount later.
Selecting an astro-camera
At first the vast number of different astro-cameras that are being offered is a bit overwhelming. I tried to get some structure in the decision process, while not overthinking it. Here is how I went about the selection:
Vendor choice: The first thing I noticed was that a large number of camera variants is basically the same sensor being integrated in cameras by different manufacturers or in different product lines by the same vendor. So for the most part you can pretty much separate the choice sensor and camera vendor. I decided to put my initial focus on the ZWO ASI Pro product line as it appeared to have a reasonable balance of technical parameters and price. Additionally theses cameras are quite widely used so I would not be alone with any problems.
Color vs Monochrome: A large portion of the most impressive astro-pictures have been shot with monochrome cameras using different wide- and narrowband filters. However, this process is more complex and less "immediate" than using a one shot color camera. Imaging and processing are more complex and take longer to get to a color picture. I didn’t feel like I was ready for this additional complexity just yet - I wanted to take pictures of as many objects as possible during the night and ideally be able to see what the object looks like right away.
Chip and pixel size: To get an idea about the most appropriate pixel size it is good to keep in mind that even at good weather conditions seeing will be about 1-2 arc seconds. So depending on the focal length the pixel should cover an area that is about the same order of magnitude. Super tiny pixels don’t result in any additional resolution at a large focal length. The available chip sizes varies from tiny to "full format". As my C9.25 optics starts to show distortion on outer part of the Canon APS-C sensor I went with a medium size. I did not want to spend a lot on a really huge sensor which can get quite expensive. I checked in a planetarium program how the desired sensor would fit the most common objects to get an impression how it would work in practice.
 |
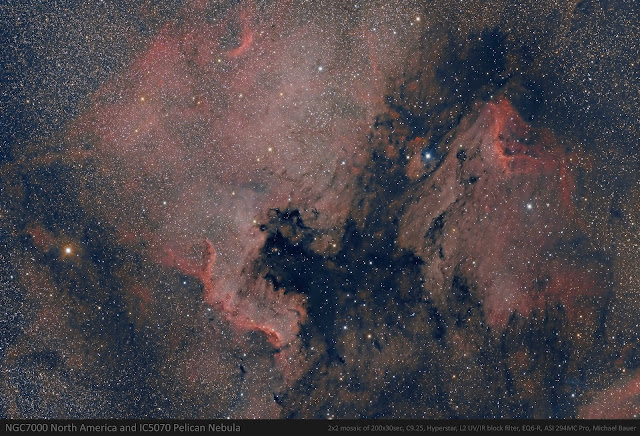
| The selected ZWO ASI 294 MC-Pro astro camera |
As a result I settled with the ASI 294 MC-Pro camera. There is probably not one single "perfect" choice, and - as mentioned - I did not want to overthink it. However, I haven’t regretted it either.
Guiding Equipment
 |
| The Guidescope ready to go with the ZWO ASI 120MM mini camera on the right |
For guiding I just went with a widely used, not too expensive camera from the same vendor - the ZWO ASI 120MM mini. I decided against an off axis solution that would split out part of the main scope’s image for guiding purposes as I wasn’t sure how easy it would be to find a guiding star at the long focal length of the C9.25 in all cases. So I just added a 60mm guidescope with 240mm focal length that is mounted parallel to the main scope on a finder scope shoe.
Here is what it looks like when it is all set up and ready to go: