Hyperstar first Light - Part 1 Setup and first Pictures
 |
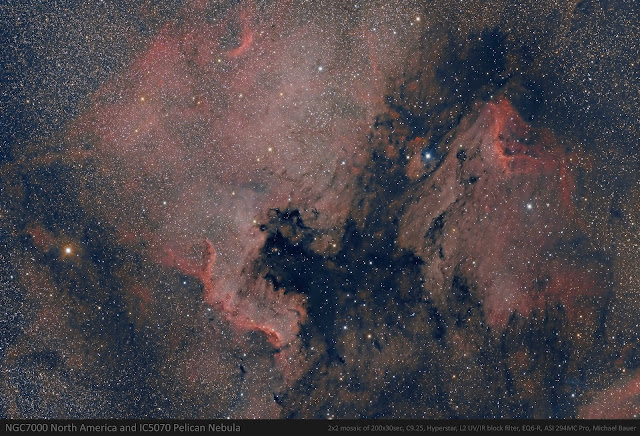
| One of the first images taken with my new Hyperstar. |
After long deliberation I bought a Hyperstar system for my C9.25 Schmidt Cassegrain. For quite a while I was torn between the Hyperstar and getting a separate refractor. I did a lot of research and in the end I changed my opinion almost on a daily basis. Finally, I decided that the pros and cons of these two approaches are probably reasonably balanced and that I need to try it myself.
If you are not familiar with it - the Hyperstar is an optical system that is put in place of the secondary mirror of a Celestron Schmidt Cassegrain telescope, basically turning it into a very fast astrograph. For example, C9.25 becomes an f/2.2 system with 525mm focal length.
 |
| The Hyperstar mounted on top of the telescope |
Rough Collimation
One of the drawbacks of a system like the Hyperstar is that, like all reflector telescopes, it requires some level of alignment i.e collimation of the optical components in order to perform optimally. However, I did not want to spend too much time on the topic during the first night of trying it. Therefore, I basically tightened all the adjustment screws so that the Hyperstar is perpendicular to its base plate. The screenshot from NINA aberration inspector shows the different corners of the image in high magnification. The deviation from the ideal star shape is not huge, but - particularly in the lower left corner - clearly visible at this magnification.
 |
| Screenshot of aberration inspector - stars in lower left corner are a bit distorted |
First imaging night
This is not a perfect collimation, but it is reasonably close to get started. All the pictures in this article are captured with this setting. I took images of a couple of nice summer sky objects. Esch of them hat comparable short exposure times as I wanted to capture a variety of pictures. Here is what I came up with in the first Hyperstar night:


These three images and the image of NGC6992 on the top of this article has been taken in the same night. I like these first results quite a bit. Particularly considering the comparably short total exposure times.
Improved collimation
After the first nights of imaging I wanted to get a better handle of the collimation. To achieve that I used a Tri-Bahtinov mask, that basically creates a diffraction pattern associated with each of the three adjustment screws.
 |
| Tri-Bahtinov mask cut out of cardboard |
The diffraction pattern for my first, rough collimation shows shows that particularly the direction bottom-left to top-right is off.

To get to better collimation I loosened all three adjustment screws by half a turn, refocused the image and then did some fine adjustments according to the diffraction patten. This is the pattern I arrived at after a few minutes:


The resulting aberration image shows much less distortion of the star images in the corners. The adjustment probably still can be improved a bit further on a night with very good seeing, but it is probably good in the meantime.